Background Ramble
Step by Step Deflasking Action
Creating an Environment for the Deflasked Seedlings
Graduation to the Glass House
Registration and Naming
1. Background Ramble
People sometimes get a flask (a sealed plastic jar) of orchid seedlings from a a nursery, orchid show, an overseas trip, on-line or from an orchid friend or a laboratory. It may contain a few or dozens of seedlings that have germinated from miniscule orchid seeds and been sown into the flask on a layer of ajar (the same agar jelly available from Chinese food stores) under very sterile conditions. There is an old saying that 'You can ask some people the time and they tell you how to build a clock'. Apologies! If you are familiar with the background to flasks, feel free to scroll down to the heading 'Action'.
Orchids grow naturally in the wild but the success rate is vastly improved by sowing the seeds in sterile conditions in flasks. There are many recorded examples of growers germinating seed on moss covered ceramic pots, wood or rocks but conditions have to be extremely carefully controlled and success rates are not reliable enough to guarantee a commercial profit.
Seedlings in a sterile flask do not have competition from other plants, insects, fungus, etc. The grower can control which seeds go into a flask by taking a particular pod and ensuring that only that pod's seeds go into the flask under invitro laboratory conditions and expect to get a very high germination rate of their selected plant. Sowing in open air (eg the glass house) risks seed being contaminated from wind borne seed from other sources.
A flask may contain only a few seedlings or dozens. The original flask may have contained lots of seedlings but these may have been thinned out by opening the flask under laboratory conditions and transplanting the seedlings to new flasks with fresh agar jelly (also the more flasks there are to sell the bigger the $ profit!). However, I recommend a flask with a few big healthy seedlings with strong roots over a crowded flask that may have many casualties in your non laboratory removal efforts. Most growers are happy to get one or two survivals for themselves and their limited space, plus a few to give to friends.
The downside of flasks is that their contents need very careful nursing when removed from their safe, sterile environment and they can take a long time before they are bigger enough to flower. Coelogynes, as an example, spend around a year from fertilisation till a ripe seed pod is formed (which you could send to a laboratory for further processing). The seeds spend another year in their flask and once deflasked will spend another 5 or 6 years before being big enough to flower. If only one or two plants are needed, many growers prefer to simply pay for a mature plant and let the professionals take care of the tricky stuff - but not everyone! Flasks can be a really cheap method of obtaining orchids and/or can be seen as another fascinating and enjoyable aspect of your hobby.
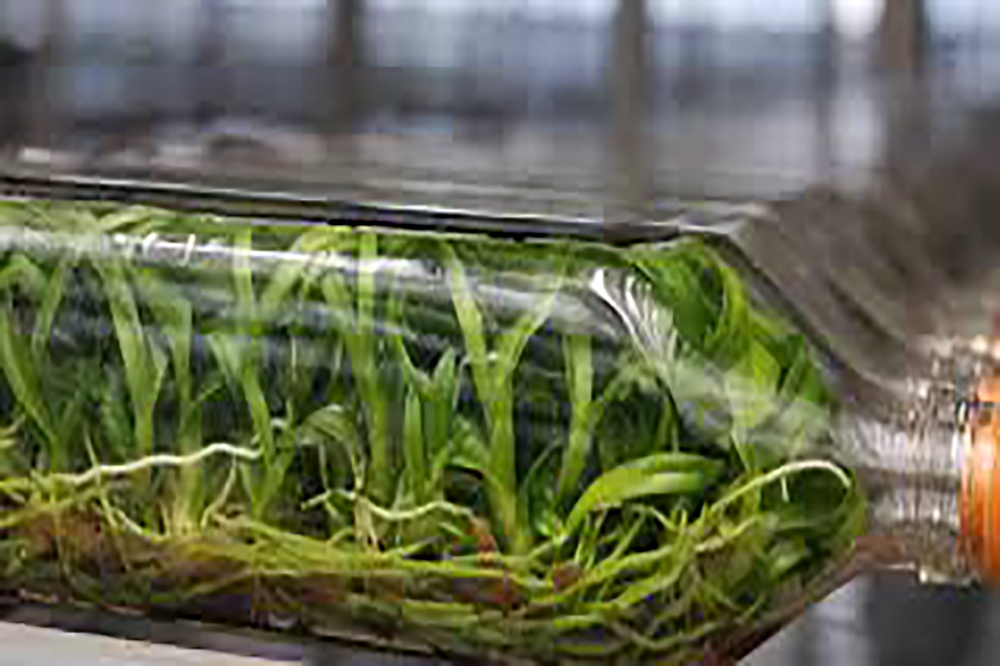
Seedlings once came in ex-spirits bottles (image above), generally with a square profile to stop them rolling around on the bench. Avoid these if at all possible because you have to smash the bottle to remove the seedlings. This can be tricky and result in a lot of broken glass shards and splinters. A recommended way of opening the bottle is to remove the cork/cap and insert a thick metal rod so that one end is in contact with the bottom glass and the other end is protruding from the opening. Cover the bottle with thick toweling for your protection and give the metal rod a sharp tap with a hammer. With a lot of luck the bottom of the bottle will fall off quite cleanly and the seedlings can be emptied out. You will still have to watch for glass splinters.
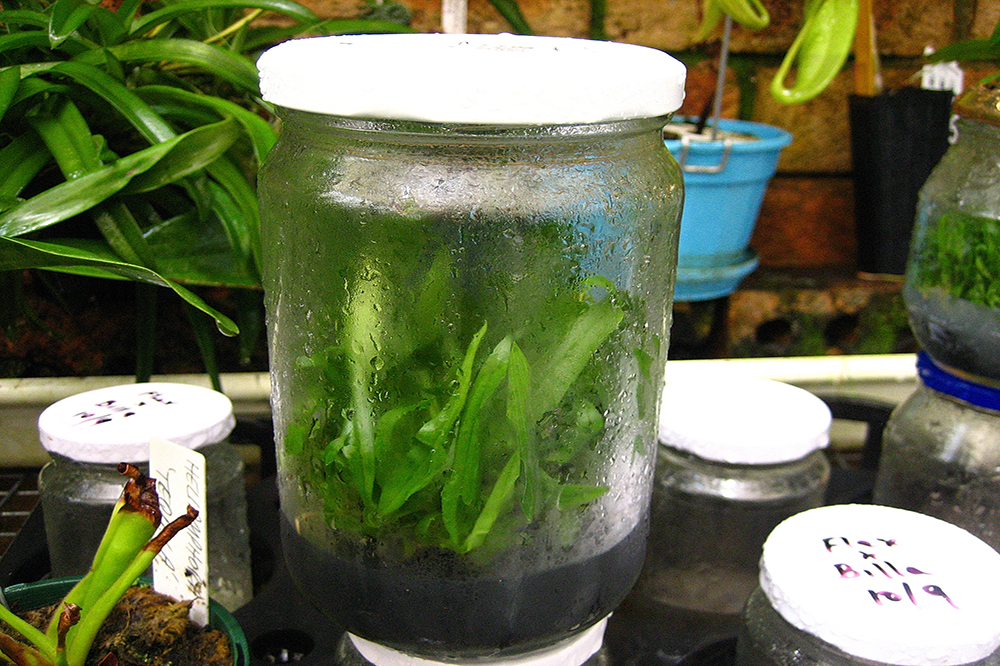
Modern flasks (right hand image above) are generally made of plastic and the wide screw-on lid is both easy and safe to remove - giving easy access to the seedlings which had been sown there on an agar jelly mix possibly a year ago. The seedlings love this nutrient rich growing mixture with no competition from foreign bacteria/fungus, etc.
The agar can come in a very sloppy or very firm form. The sloppy agar doesn't travel well and is more difficult to clean off the seedlings. Also, once the sloppy muck has gotten all over the leaves they need to be deflasked and washed very soon - the leaves won't be able to breathe with jelly all over them.
Firm (more concentrated) agar is better for transport and can even be suitable for sending through postal services and sometimes remain completely intact. I recommend floating these flasks of stiff agar in warm water before opening in order to slightly soften the fairly solid jelly and make it easier to remove from the seedling roots.
The colour of the agar can range from quite clear to dirty yellows to almost black if it has had charcoal added and even really pretty colours when dyes have been added to make the flasks irresistible to tourists. The colour makes absolutely no difference and should be ignored. If the seedlings look healthy you can buy them.
Leaving the above background information you need to move on to some instructions on how to get the seedlings out of that flask. Like all other aspects of orchid growing, there are dozens of ways/recipes ranging from really basic to extremely complex ways suitable for a trainee brain surgeon! As with many things in life, experience is a wonderful but costly asset. You could grab a couple of cheap or giveaway flasks to experiment with. Also, it is good insurance to share the task with a couple of friends and thank them by giving them a flask to either mind or keep. One of you may have more luck than the other and it is good insurance not putting all your eggs in the one basket. Also I recommend some time browsing the internet - there are lot of YouTube tutorials that can get you in the frame of mind.
2. Step by Step Deflasking Action
I have deflasked many flasks of various orchids and really believe in the KISS principle (Keep It Simple Stupid/Sweetie). Now is the time for action!
I take over the laundry. I clear the bench top and fill the laundry tub with warm water (WARM - don't try to cook the plants!). I float my flask in the warm water to soften the agar a little. Don't risk getting the ID's mixed up by doing more than one flask at a time. While this is happening, I spread some sheets of newspaper on the bench and soak them with water in readiness to place my seedlings (which must be kept moist at all times). I soak sphagnum moss in a bucket of tap water (no need for special or non-fluoridised water). I get seedling trays ready. These can be new or recycled. I never bother sterilising them. I get a permanent marker pen and labels and write on them. I don't bother getting any disinfectants, sterilisers, fertilisers, etc. They aren't really necessary, even though many people love to use them - Nature doesn't bother!
I unscrew the flask with the now slightly softened agar, tip the seedlings into the sink and gently massage the agar from their roots. At this stage they should be separating and sinking to the bottom of the sink. Take each one and gently clean further under the running WARM tap if necessary. Place each seedling on the wet newspaper in rows from the biggest, healthiest seeding to the sickliest one (which may get thrown out at the end!). If coffee distracts you for awhile make sure you fold the wet newspaper over the seedlings to keep them damp.
Pick up the largest seedling each time and very gently fold a small bundle of the wet sphagnum moss from the bucket around the roots. Keeping the moss very loose gently place the seedling into a hole in the tray. Do not press the moss into the hole. The aim is to have as much air in between the strands of moss as possible. Add a label. The first one is done! For the smaller seedlings you could put two into the one hole. The biggest ones are going to be the ones you will want. They have already proved that they are tougher and more robust than their peers. This concludes the deflasking stage. The next step is to create an environment that is light, warm, humid and consistent for the next couple of months.
3. Creating a Seedling Environment"
I use recycled rectangular glass aquariums (2,3 or 4 feet long - it's often very easy to get one free if it has a crack in the glass).This becomes a modified terrarium. You could use an actual terrarium or one of the cheap plastic seed raising humidi-trays. The point to watch is the smaller the terrarium the more its internal conditions will be influenced by outside conditions, e.g. temperature.
To set up an aquarium, add a few centimetres of water on the bottom. If there are any cracks on the bottom, seal them with a bit of silicon jelly along each crack. Cracks in the side pieces of glass aren't as serious. Add an aquarium heater on its side so that it is totally covered by water (it needs to be covered with water or it will crack and fail). Next place a few old bricks or blocks on the bottom and then some old racks or baking tray racks or whatever to form a shelf about 10 to 20cm above the water and forming a good gap so that the seedlings are nowhere near the water.
Now place the trays of seedlings on top of the shelves. Before you fill the trays with seedlings you should check the size of the trays to make sure you can get them in easily and safely into the aquarium. You might need to cut some of the trays into sections or trim them before you add the seedlings. Next, add the normal sheets of glass that come with an aquarium to form a lid/s . These are designed with gaps to allow a small amount of air to get in an out of the aquarium.
The final step is to add fluorescent lights on top. You can spend a lot of special light spectrum tubes but standard house lights are perfect. Connect these through a timer switch so that they switch on and off every 12 hours or so that the seedlings get a reasonable length of regular light. Don't use lights that are going to generate a lot of heat.
You have now created a very consistent humid environment for your babies (a bit like a hospital humidi-crib!). Keep it out of direct sun or outside temperatures because you have already made your mini-environment and you want to keep control. You could add an aquarium thermometre to really fine tune it but it's not necessary.
This will be their home for the next couple of months until they are growing strongly and ready for the next stage of life out in the glass house. Monitor the water level so that the heater is covered and to stop the water becoming disgusting. If the spaghnum moss looks at all like it might be drying out a little then give the aquarium a very light mist of extremely weak liquid nitrogen fertiliser. Don't forget that the moss is also a living living plant and too much fertiliser will have it growing madly in this perfect environment and you may have to get the scissors and 'mow' it! Some seedlings will grow madly and others will drag their feet for many months. Keep talking to them!
Although the above setup is pretty cheap it is designed to be used over and over again. If you are only using as a one off exercise then try to duplicate as many of the above conditions as possible. For a single flask you could use a large clear plastic bag over the tray of seedlings and keep it in the most suitable place in your house - the kitchen is good because you will see the plants every day.
4. The Glass House Move
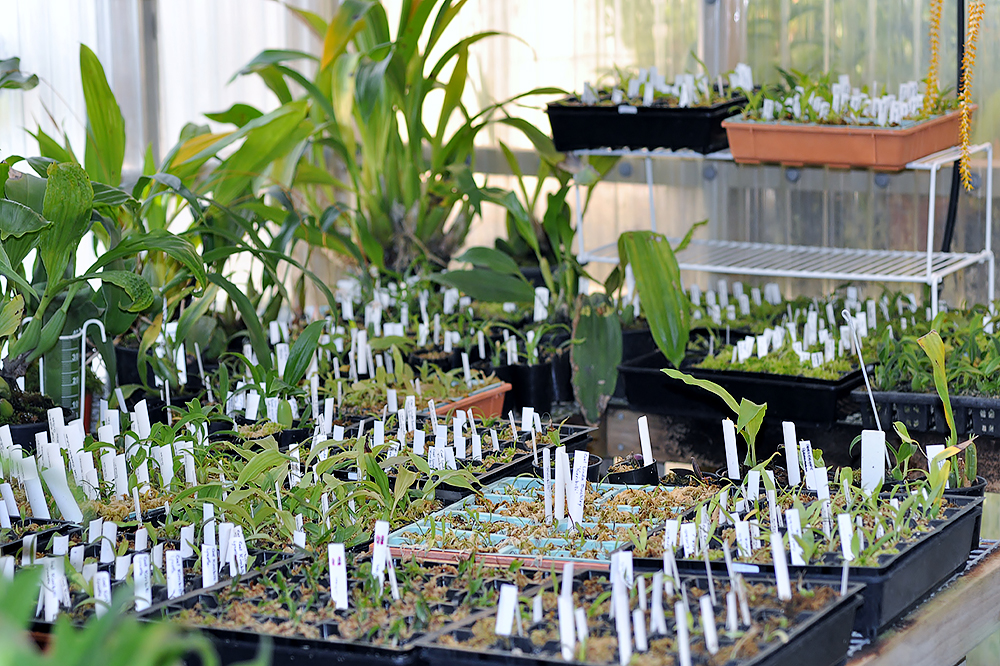
Check out your glass house and look for a spot that has good indirect light, even conditions for gentle air circulation (no drafts) and an even warmth - probably a bright corner of the glass house e.g. as in the image above right. Here, there are a number of trays deflasked at different stages - all in sphagnum moss. Note how in some of the older trays the moss is also growing. This is a healthy sign but watch that it doesn't smother the seedlings.
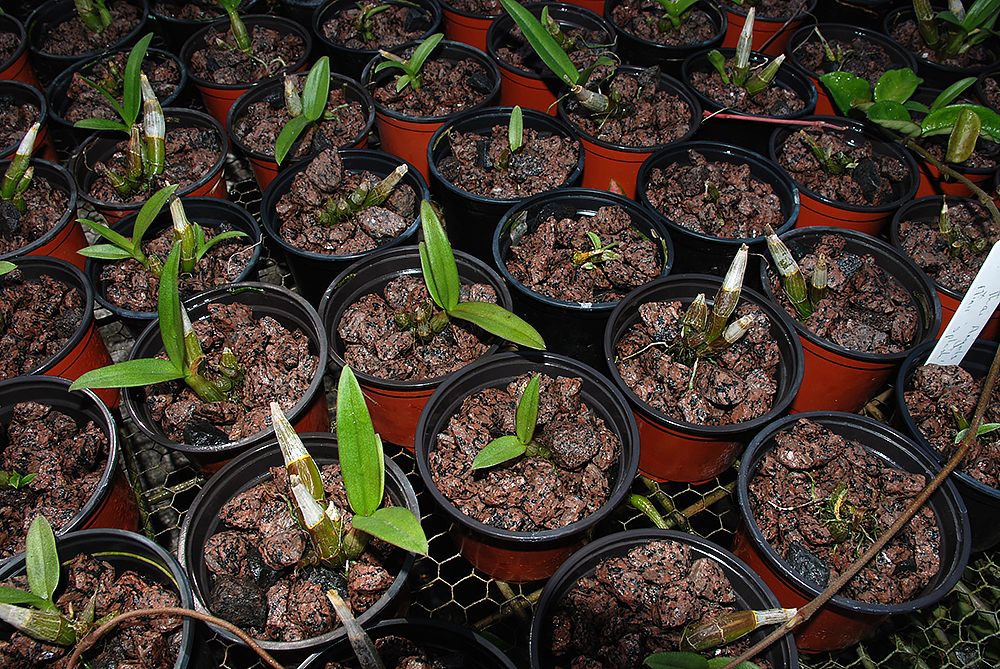
The seedlings can be moved into the glass house in their trays for the first couple to a few weeks. It will be a tougher home than their aquarium home. It will have more temperature and humidity variation but moving the whole tray will cause minimum disturbance to their roots. Mist them daily with an extremely weak solution of liquid nitrogen feriliser (eg Aquasol) to keep the humidity high. When they appear to be growing actively again it will be time to pot them into individual small pots of a very open orchid media that can contain lots of moisture and massive amounts of air e.g. medium bark/coconut husk very loosely added (see the section on media). Avoid anything that will clog up thus stopping perfect drainage and air movement. The image above shows a Darwin nursery using gravel. This works perfectly in a very humid environment but elsewhere it may dry out too much without a really good misting system. I would place the seedling trays over trays of water to keep the humidity higher. The image is added to show that you don't need tomato raising mixture! Note that in the right hand image the trays are also sitting on top of metal grills to help improve both drainage and air circulation. Not visible in the image but these benches are covered with old carpet under-lay foam which also adds enormously to the humidity levels because it holds so much water. You can also cover the floor with wood chip, gravel or carpet. Watch carefully for snails and slugs because they love these damp and humid conditions!
Some seedlings will graduate much faster than other smaller less robust siblings. Give the bigger 'heroes' preferential' treatment and pot them up earlier. Talk to them and you will have great success.
5. Registration and Naming
If you know the parents of a hybrid then it should be registered with the Royal Horticultural Society in Kew, London. This makes life easier or nurseries, other breeders and fellow growers.
Plants can be registered online by going to rhs.org.uk and simply setting up an account (so that you can pay the 12 pound fee) and leave your email for further communication and receipt of your certificate). If you are not the originator then you need to acknowledge who is on the registration form. If you don't know then you need to show evidence that you have tried to contact the them.
A couple of botanical terms are involved on the form. 'GREX GENUS' is simply the orchid type that you are trying to register - In this case you fill in COELOGYNE to show that it not a Cymbidium or a Dendrobium. The GREX EPITHET is the original name that you would like to call the new hybrid. You get to suggest two names just in case the first name is not acceptable or already taken. For simplicity, try to keep your name choices to only three words (the fewer the better). An example from a registration form of mine was;
1. Coelogyne Kirribilli Marie (1st choice). (This is the one that was accepted)
2. Coelogyne Kirribilli Marie Clarice (2nd)
The next term is EPITHET under the parent section. There are around 200 Coelogynes, each with their own name or epithet. For example, a big beautiful white Coelogyne has the epithet or name of MOORENA so if it was one of the parents then it would be called Coelogyne mooreana. If it was a special mooreana someone may have been given it an extra epithet or name to separate it from all the other pure bred Coelogyne mooreana. An example of a Varietal or Cultivar epithet is Coelogyne mooreana 'Brockhurst or Coelogyne mooreana 'Alba' (a pure white form).
Try to take photos of the first flowers that are produced and attach these as files to your application. You can/should also write a description of the plant and the flowers. There is not much space on the form but you can also add a longer description as an attachment.
The register ensures that a name is only ever used once. You can name plants after people. Normally a name includes "Memoria" if it is named in memory of someone, e.g. Coelogyne Memoria Wilhelm Micholitz is named in honour of the German orchid collector. It is sometimes abbreviated to Coelogyne Mem W Micholitz.